The Provident Homemaker
  • Recipes and Info
    • Making Bread
  • My Blog
  • Favorite Resources
  • Documents and Files
  • 52 Weeks of Building Storage

Mom's Double Double Apple Crisp

9/25/2021

0 Comments

 
Picture
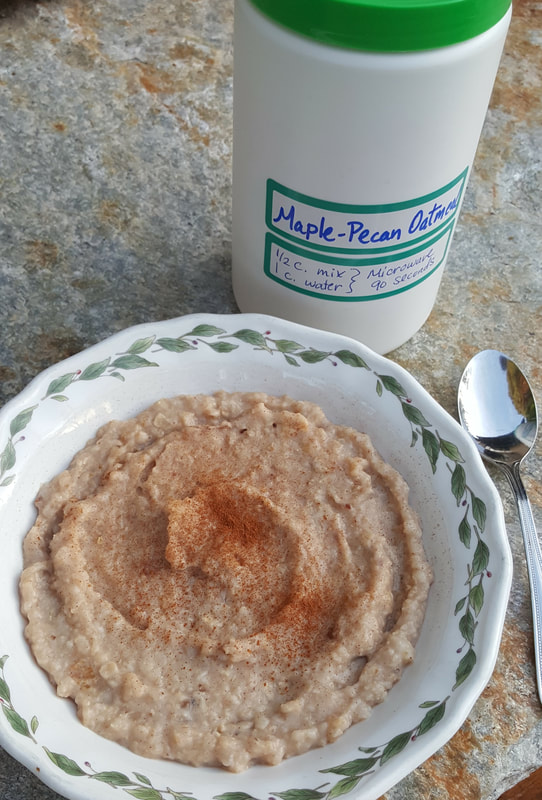
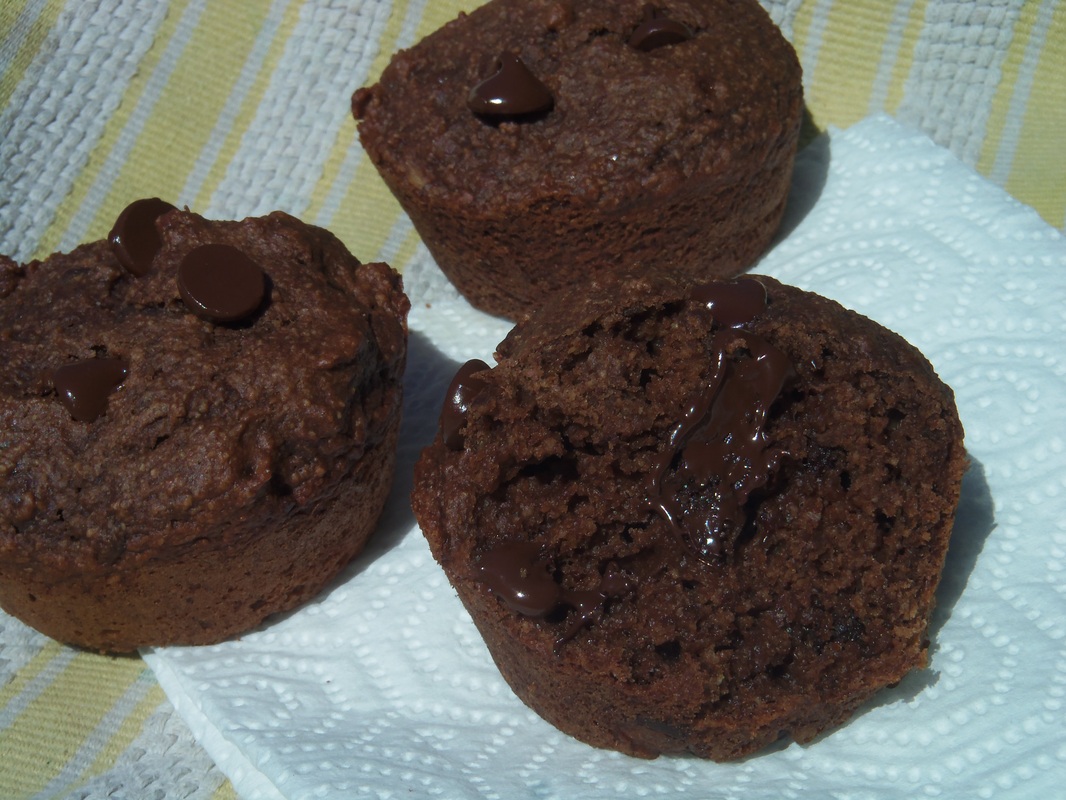
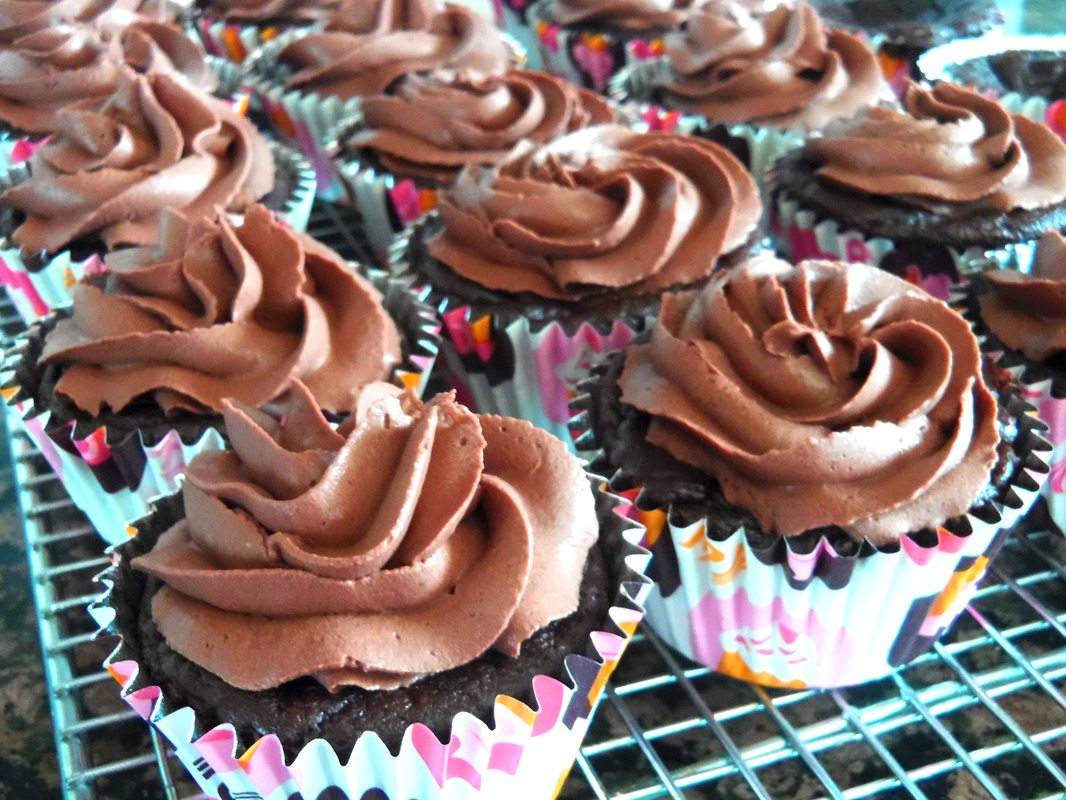
This is called the 'Double-Double' recipe because each of the three main topping ingredients (butter, brown sugar, flour/oats) is double the quantity of the one before. You can use that same ratio to make cookies- to a quantity double what’s listed below (= use 1/2 cup butter) also add one egg, ½ tsp. baking soda, ½ tsp. salt, and a big handful of chocolate chips or whatever else you want in there.  You've got cookie dough!
 
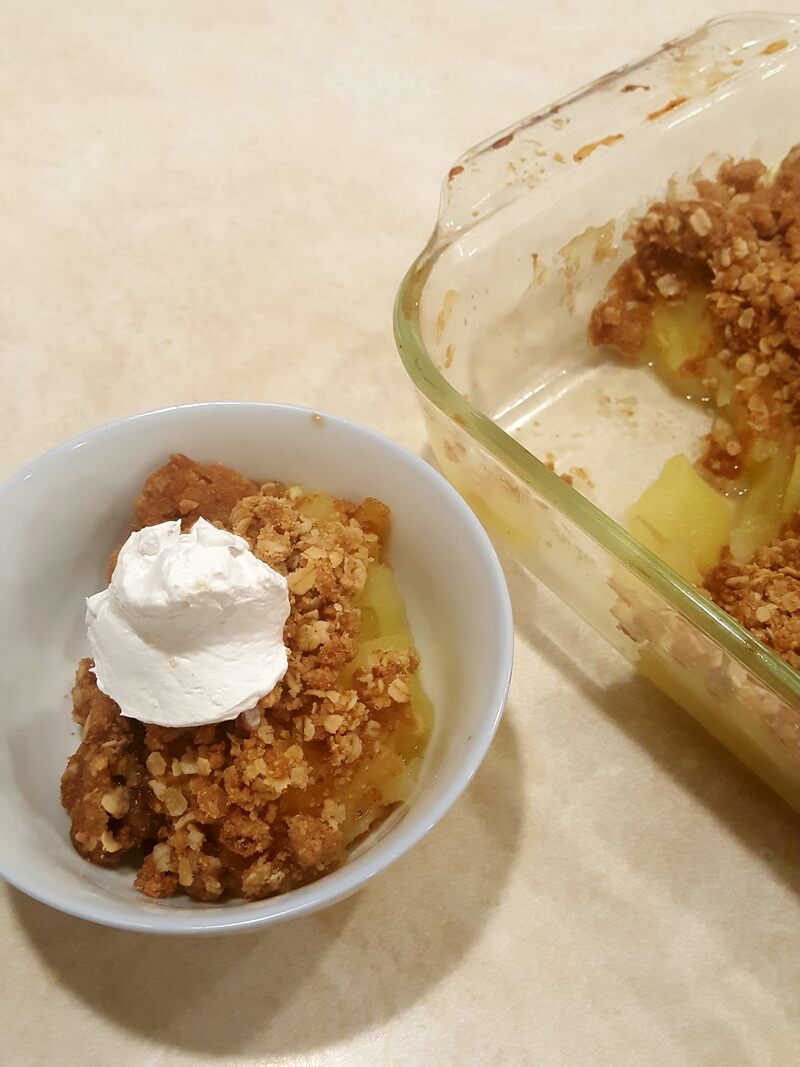
Mom’s Double-Double Apple Crisp
Makes 4-6 servings

5-6 apples, peeled and sliced—enough to mostly fill an 8x8 baking pan --or about 4 c. dried apple slices
¼ cup butter, softened or melted
½ cup brown sugar
1 cup flour- or use ½ cup quick oats and ½ cup flour (gluten-free flour works just fine)
Optional: 3/4 tsp. nutmeg and/or cinnamon
 
If using dehydrated apples, put them in the 8x8 pan, cover with boiling water and let them soak while you make the topping. 

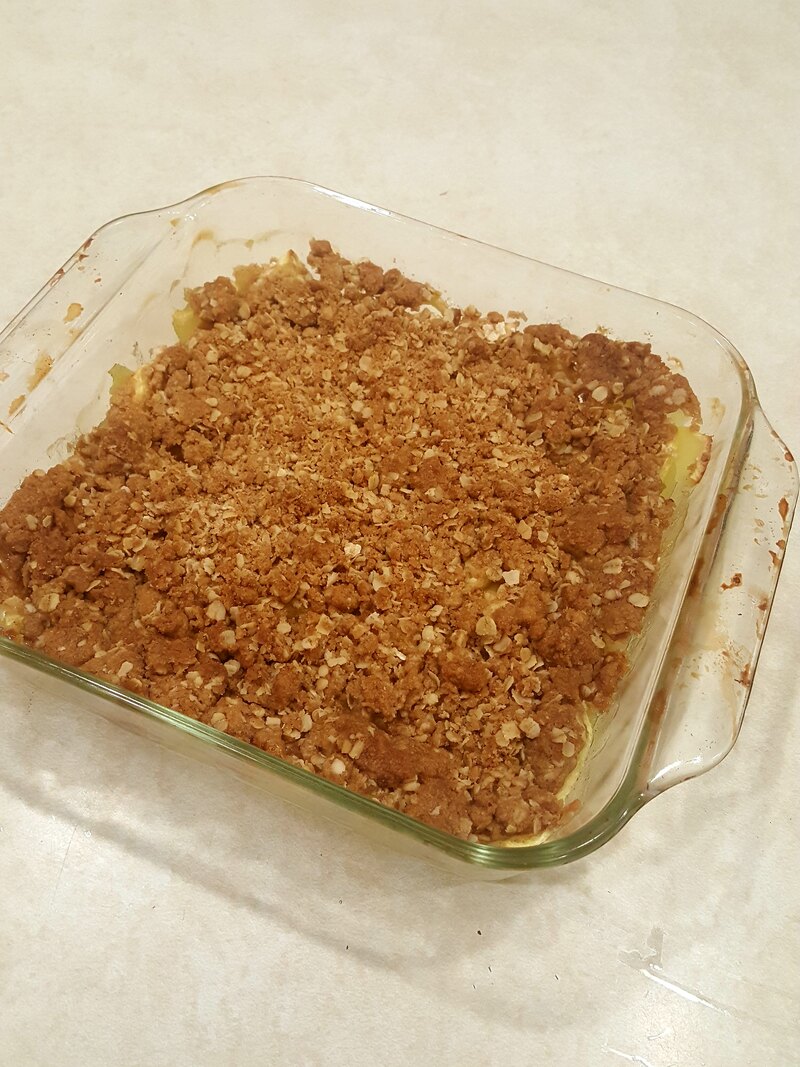
In a small to medium bowl, stir together the sugar and butter. Mix in everything else until no flour patches remain, but you still have some lumps. (They’re the best part!) 
Drain off extra water from the apples, leaving just a little in the bottom.  (Save the drained water for making bread, breakfast oatmeal, for feeding a sourdough start, add to a smoothie or other drink. It contains a little bit of Vitamin C and some natural sweetness.)
 
Cover the apples with the topping.  Bake at 375° F for about 25 minutes, until topping is browned and crunchy.  If using fresh apples, you’ll need to bake it 30-45 minutes. 
 
Serve with whipped cream or ice cream.


Picture
Picture
0 Comments

Week 45- Beans, and Aunt Gen

2/22/2020

3 Comments

 
Picture
To help with building your year's supply (this is Week 19 of 26), see this chart. 
 
This week I’ve been thinking a lot about old-time things.  My aunt Gen (short for Genevieve) died on Tuesday. She’s my great-aunt, and her last remaining sibling on earth is my grandma. They and their brothers were born in the Mormon colonies in Mexico. All of them lived well past 90 years old. Gen was born in 1918, the year of the great Flu Pandemic, just after her family returned to Mexico after being evacuated during the Mexican Revolution. She was one tough and smart cookie, and one of the kindest people I know. She grew up without electricity, running water, or indoor plumbing. She was a young mother in the last years of the Great Depression. She cooked over fire and charcoal; her first home as a bride had a brick stove with a hole on top in which to put charcoal. She got herself a 5-gallon metal bucket, turned it on its side, cut a door, set a rack inside it, and placed it over that hole. That was her oven.  “I couldn’t bake very large of loaves,” she said, “but it worked.”  The first car her family owned was purchased when she was in her mid-30s.
 
When I was younger, she lived about halfway between my family’s house in Utah and my grandparents’ home in El Paso.  We’d often stop and spend the night with Aunt Gen. Even in the 80s and 90s, she had no TV in the house, which made for lots of times sitting and telling stories or playing games. And she always—always!—made us lemon sugar cookies.  (Maybe I’ll post that recipe soon.  Twenty years ago or so I tried to duplicate it several times-- and failed—until I called her one day and learned the secret.)

​She moved next door to her son in Utah about 30 years ago and had been there ever since, gardening and canning with his wife and children, teaching the kids to crochet, bake apple pies, and shuck corn. When she was in her 80s, they found her one day on the roof, leaning over the edge with a big straw hat on. She was cleaning out the rain gutter with a running hose and a screwdriver to loosen the packed leaves.  She was sick her last little while—though even in her last ten years she didn’t take a single prescription medication. She had a homemade cure for everything-- and they worked!  ("For a bee sting, soak a tomato leaf in rubbing alcohol, then put it on the sting.")

What a lot of things she saw and did in her 101 years!  And her older brother, Uncle Elvin, made it even longer. He was 103. 
​
I sometimes wonder if and when we'll need those same skills and ingenuity that her generation had. 
 
One food she was very familiar with was beans. They were a cheap, filling, healthy source of protein, B vitamins, iron, calcium, and magnesium. She and I both learned from her mom (my great-grandma Lillie) how to make the most delicious caramel for dipping apples, spreading on cakes, or digging into with a spoon. It didn’t have beans in it but was served at many bean meals. This is why:

She’d take a can of sweetened condensed milk, remove the label, wash the can, and set it in the bottom of a big pot. A stockpot type one, taller than the can was. Then she’d pour in some dry beans, carefully picked through to remove any little rocks or dirt clods, measure in some salt, and add enough water to cover the top of the can. Then the beans would be simmered for three or four hours until they softened through. (We didn’t ever let the pot boil dry, or the can could possibly have exploded.) When the beans were done, the caramel was done.  We had to be patient while the can cooled down enough to open without spurting hot caramel on us. And the wait was worth it.
 
Do you wonder what the differences are between all the different kinds of beans?  They’re all from the same sort of plant, and can be interchanged pretty freely. There are different sizes, colors, textures, and flavors.  For that information, see the first two pages of the USU publication, Dry Beans and Peas. It also tells you how to cook them, whether you prefer the quick-cook method, the overnight soak method, or using a pressure cooker, slow cooker, stove top, or microwave.

If you’d like more old-time recipes, there are lots. Let's look at two that Aunt Gen would likely have been familiar with while raising her children.
 
“99 Ways to Share the Meat” is a brochure created in 1943 to help Americans cook under the new meat food rationing. 

It includes advice on what to put with beans to flavor them.  For we modern folks who might not know, ‘salt pork’ is bacon that is cut thick like steak, rather than sliced.  Bacon is a great substitute.  Same flavor, same cut, different shape.

85. For plain cooked beans, soak, simmer slowly in a covered pan. Flavor with something salt[y], sour, fresh, crisp, bright, or spicy.

86. Bake beans long and slowly.  Good seasonings are molasses, mustard, salt pork, onion.

87. For better bean soup, add finely chopped peanuts… tomatoes… carrots… or a few slices of frankfurter or bits of cooked ham or sausage.

88. Hearty bean sandwich fillings. Combine baked beans with onion, pickle, relish, or catsup… Moisten with salad dressings… Combine chopped peanuts and baked beans.

97. Press cooked [beans] through a coarse sieve or grind in a food grinder
[food processor] for pulp to make soup, croquettes, loaves, souffles.

98. Use cold [bean] pulp as filling for sandwiches.  Mix with chopped onion and enough salad dressing
[we’re talking mayo or Miracle Whip type stuff here] or milk to make it easy to spread.

Picture
There was a WWII-era, government-sponsored recipe book called “Dried Beans and Peas in WarTime Meals”. I haven't managed to find anything but references to it, but did find its replacement from 1952, a 28-page booklet called Dry Beans, Peas, Lentils …modern cookery. The photo to the left is the index to those recipes.

The pamphlet begins by telling us, “Dry beans and their close cousins, the dry peas and lentils, are food bargains, budget-wise and nutritionwise.  When buying, you can figure that a pound of one of these dry foods will provide 7 to 9 servings.”  And then it tells about nutrition and getting the best protein value from them, which ones need soaked ahead of time, how much water to use when cooking them, and shortcuts for soaking and boiling them.  Of course, recipes follow. (It also tells you how to can bean puree; disregard that, as it doesn’t fit within current USDA safety guidelines.)
 
What bean recipes do you love?

3 Comments

Week 33- Using and Storing Oats

11/23/2019

0 Comments

 
Picture
To help with building your year's supply (this is Week 7 of 26 of building a year's supply), see this chart. 
 
About ten years ago, the Church had a pilot program called the Wooden Spoon Cooking School, designed to teach people how to use their basic food storage items.  The segment on oats has lots of great recipes, including Craisin Oatmeal Cookies, Oatmeal Bread, Oatmeal Spice Cake with a coconut-nut topping,  No-Bake Oatmeal Peanut Butter Cocoa Cookies, Oatmeal Pancake Mix, Granola Bars.  See here.   
 
Rolled oats, quick oats, oat groats, steel-cut oats, and oat flour are high in many vitamins and minerals, including zinc, vitamin E, beta-glucan, and B-vitamins.  They also contain soluble fiber, which is a prebiotic (=sets up conditions for probiotics to thrive), reduces cholesterol, and improves regularity.  They have a great balance of amino acids (proteins), including a good amount of lysine. 
 
Oat groats are the whole kernels
Steel-cut, or Irish, oats, are coarsely chopped groats. 
Rolled oats are regular oats are old-fashioned oats; they are groats that are steamed and flattened.  They take 5 minutes to cook, and hold their shape and texture better.  They are chewier in cookies.  Use either one in recipes.
Quick oat or minute oats are groats that have been flattened more, and take 1 minute to cook.
Instant oats have been precooked.  They have the least nutrients.
 
About 15 pounds of rolled or quick oats will fit in a 5-gallon bucket.  How long do they store well? As always, this depends on your storage conditions.  Overall, they store longer than flour, but much less than whole wheat kernels.  In my cool, dark basement, oats stored in 2.5- and 5-gallon buckets- with no treatment to remove oxygen- are still completely fresh after 3-5 years.  I’ve used some that were 10 years old; they’re distinctly less fresh, but are still usable.  (Lightly toasting them in a pan or oven helps remove some staleness.) And if they’re stored oxygen-free in a can or bottle, they can stay fresh for 30 years or more.
 
The classic use is, of course, oatmeal.  I’m sort of OK with oatmeal, but it’s not my favorite.  Once a week is about all I want to handle.  But—and this was a big thing for me—it turns out the texture makes all the difference.  I’m not a fan of thick and gluey, but do like soft and billowy.  The standard recipe says to use 1 part quick oats to 2 parts water, but that’s pretty thick.  I like it much better when cooked with a 1:3 ratio- 1 part oats to 3 parts water or milk. Or orange juice. Or a mixture of the two.

Of course, there’s also overnight oatmeal in lots of flavors.  Check out this list.

Substitute up to half of the flour in pancake, muffin, or quickbread recipes.  Use 2 cups of oats in place of each cup of flour.  (A recipe calling for 2 cups of flour could be changed to 1 cup flour and 2 cups of oats.)  See here for some options.

Since oats don’t have gluten, you can only replace up to ¼ of the flour with oats in yeast bread recipes.
 
Add a handful of oats to soup or stew to thicken it.
 
Use in meatloaf or meatballs to make them more moist.
 
You can even toast rolled oats and bake them in a pie—Use a pecan pie recipe, and replace the pecans with oats.  I’ve seen it called both “oatmeal pie” and “mock pecan pie.”
 
You can make your own granola or 'honey clusters of oats.' 
 
Make Instant Oat Packets.
 
Use oats in a crust instead of graham cracker crumbs.

There’s a coconut-oat crust here: 
 
Use a blender to make oat flour; there are suggestions for using it in this post.  
 
One option is these gluten-free chocolate fudge banana muffins.
 
Stir into Healthy Peanut Butter Banana Bars.
 
Just-the-Best-Breakfast Cookies-- Two cookies are about the same nutritionally as one homemade, normal-sized muffin, and much better for you than commercially-made muffins.
 
Use in the topping for Apple Crisp.


What is your favorite way to use oats?
0 Comments

Week 32-  Storing grains and more – dry pack and vacuum method

11/16/2019

0 Comments

 
Picture
To help with building your year's supply (this is Week 6 of 26), see this chart. 

How do you keep your dry foods safe?  That depends on a number of factors, including the local climate, humidity levels, if your storage area is cool and dark or not, and how long you need to store it. 
  
One good option is the ‘dry pack’ method. 
You pack (or pour) dry food into an airtight food grade container.
 
There are better and worse ways to do this. (See here for ALL about it!)
 
Several years ago I attended a class at a local grocery store where the teacher showed us how to extend the shelf life of dry foods.  Some of those foods were wheat and rice, but she included chocolate and nuts.  You can store peanut M&Ms?!  She said this was an experiment, but they’d stored beautifully for a year and she didn’t know how much more to expect.
 
She used glass canning jars, lids, and a seal-a-meal (vacuum packaging)  attachment for canning lids. 

I don’t have the attachment, but discovered something else that works-- oxygen packets!  A 300cc oxygen pack will remove oxygen from filled containers up to a gallon in size. The cheapest way I’ve found to buy these is through the Church’s website, in quantities of 100.  If you’re buying them elsewhere, know that a 100cc oxygen pack is powerful enough for any container of one quart or less.

Oxygen packets are little squares—about 2” across and mostly flat—that contain iron powder.  Oxygen crosses through the packaging material, where it causes the iron inside to rust.  This permanently locks up the oxygen. 

Oxygen packets are recommended for dry-pack canning for two reasons-
  1. their use quickly removes oxygen that could keep insects alive in what you’re storing, and
  2. removing oxygen extends the shelf life of a food.
 
Three things, more than any others,  shorten shelf life of foods once moisture has been reduced--oxygen, light, and heat.  If you can remove the oxygen, the food will last longer. This is especially true if you store it someplace dark or cool, and preferably both. 
 
But removing oxygen also creates a vacuum, which can seal the jars for you.  No seal-a-meal vacuum attachment needed. 
I’ve been dry-packing food in glass canning jars, as well as PET and PETE plastic bottles, for about ten years.   
PETE plastic bottles include those you buy juice in.  Check the bottom of the bottle, and if it says PET or PETE, you can use it.  You can also use food storage foil pouches, which can be cut to whatever size you like, and sealed all the way around.

Make sure your containers are clean and dry, then fill most the way with whatever food you’re placing in it.  Add an oxygen packet, screw on the lid, label, and store somewhere cool and as dark as you can find.  (I like to run a band of masking tape around the lid edge, so I can tell at a glance later if someone opened it—a real possibility in a houseful of children!) 

Simple, right?

But dry-canning in glass jars—vacuum canning-- has been a game-changer for me. You can use any size of canning jar, from the little 4-oz ones to the big 2-quart size.
 
Here’s how I do it:
Get jars, lids, and rings ready- they need to be totally clean and dry. 
Get your food ready- totally clean, with moisture levels below 10%

Get your oxygen packets ready- keep them in their sealed package or airproof jar until the last minute. 

Fill the jars up to the neck only, or a little below the neck.  You’ll need a little bit of extra space in there, and overfilled jars don’t seal well.  Set a new lid and ring (band) to the side of each one. Wipe off the top of each jar, to be sure you have a clean surface for the lid to seal to. Open up the oxygen packets, and, working quickly, drop a packet into each.  Quickly top each jar with a lid and screw the band on.  Label each jar with the contents (if not obvious) and the date (always).

Oxygen packets will start to absorb oxygen immediately, and you don’t want them using up all their power before they’re in the jar!  You can tell the packets are working because they warm up.      
Store the leftover packets in a glass jar with a lid and band firmly screwed on.  They’ll be ready the next time you need them.

The oxygen packets will do their job in the food jars over the next 48 hours, dropping the oxygen content down to .1%.  As this happens, suction is created inside the jar, making the lid seal.  It’s not as secure of a seal as you get with regular canning (steam, water bath, or pressure), but it almost always holds.  Avoid bumping the tops of the jars, since this can knock lids loose.  Leave the bands on for at least the full 48 hours.  You can leave them on the whole storage time if you like. 


I’ve have learned a few things along the way. 

Removing oxygen makes a huge difference, and I can even store foods with a high fat content (peanut M&Ms!) for a few years without them going rancid. 

When storing my homemade tomato powder the first year, I used oxygen packets with some jars, and not with others.  Dried foods are listed as ‘best within a year,’ though that depends a lot on storage conditions.  Two years later, there was a visible difference between the oxygen-free tomato powder and the untreated powder.  The ones with oxygen removed were still as brightly colored—and nicely flavored—as at the beginning, while the others had lost both color and flavor. 
 
How long does sealing and removing air extend shelf life? 

That depends.
 
When stored in my cool, dark basement, nuts have remained great for about 5-6 years.  I recently opened two jars of walnuts canned in 2010! One jar had remained sealed, but the other hadn’t. While the sealed-jar nuts were definitely better three years ago, they were still in the realm of ‘OK’.  Barely.  But the ones that had lost their seal?  Awful.   Really, truly awful.  The smell of rancid oil assaulted my nostrils as soon as the lid was lifted, and those nuts—stored side-by-side with the other jar—were several shades darker.  (I gave those to the chickens.  Not sure whether they got eaten or not.)   So the moral of the story is to ROTATE your food.  Use it.  I try to store the right amount of food to be able to go through it in the next two years, and that would have been great.  Try to use any high-oil-content food within at least five years.

But low-oil foods like rice and wheat?  They’ll store nearly indefinitely.  20, 25, 30 years or more are the estimates from BYU’s food studies. But still rotate using it.

Things I’ve successfully home dry-packed (stored in airtight containers with oxygen packets)

→Rice
→Vegetable powders- tomato, zucchini, pumpkin, beet
→Citrus sugar (dried zest from orange, lemon, or lime, added to sugar and run through the blender to form a powder.  I use it in place of orange or lemon extract.) https://www.theprovidenthomemaker.com/1/post/2010/10/garden-seeds-homemade-orange-flavoring-and-easy-marmalade.html
→Dried candied orange peel (also used to flavor recipes- see the same link as citrus sugar)
→Thoroughly cooked and dried crumbled sausage (all dry packed foods MUST be below 10% water content, or you risk botulism)
→Raw almonds, walnuts, pecans, macadamia nuts, pecan meal, pumpkin seeds, pine nuts, pistachios, smoked almonds, honey-roasted peanuts …
→Sesame seeds, flax seed,
→Spices
→Bridge mix
→Trail mix
And probably more that we’ve long since eaten and forgotten about.
 
I don’t dry-can dried fruit, because it lasts a few years anyway, we’re pretty good at rotating through it, AND I haven’t wanted to do the measuring and weighing to determine if the moisture content is low enough to dry-can it safely.
 
The things people usually dry can at home are wheat, rolled oats, beans, lentils, rice, etc.

So why did I put these other things in jars with oxygen packets?

There are 3 typical reasons- (1) something was at a really good price and I wanted to have it last, (2) I naturally had a lot of that thing, or (3) I was curious to see if it would work! 
 
In the case of all those nuts and seeds, there used to be a local nut packaging company that only allowed its wholesale customers to keep any particular product on the shelf for six months.  Whatever didn’t sell in that time was returned to the company, who would resell this ‘expired’ product for $1 per one-pound bag… no matter if the bag contained gummy bears or macadamias.  Most of the time the nuts were still very good—depending on how and where the store displayed them—in a hot window or on a cool, darker shelf.  As you can see from the photo and list of things I’ve vacuum-canned, my friends and I took full advantage of this!  
0 Comments

Week 18- Make Your Own Cream of Tomato Soup

8/10/2019

0 Comments

 
Your weekly assignment- you have two this time!  B4-3, and do a quick inventory of nonfoods. These include toilet paper, shampoo, soap, dish soap, laundry soap, hygiene supplies. Record what nonfoods are open; note how much is in each. At the end of four weeks, go through them again.  Note how much of each you used; multiply by three to know what you need for 3 months’ supply, or by 12 to know for a year supply. (Purchasing these begins in one month.)

Tomatoes are in full production mode in my garden right n
ow.  I made a couple dozen jars of salsa this week, and picked tomatoes again this morning.  About half of them went into a giant, double-size lasagne for my son's birthday dinner, but there are a couple quarts of cherry tomatoes left over.  I'm debating whether to make a cherry tomato salad tomorrow (yes, it's the right link; scroll down), or this cream of tomato soup. 
It's simple and delicious. Using cherry tomatoes increases the natural sweetness; did you know that commercial versions almost always add sugar to their tomato soup?  

Another advantage to making it yourself is you can substitute out any ingredient you have food sensitivities to.  Can't have dairy?  Use a nondairy milk instead, or coconut cream for a richer version.  Can't have wheat or gluten?  Use cornstarch to thicken it instead of the flour. (You'll only need half as much, and don't add it to the hot vegetables; add it to the blender along with the broth and tomatoes.)


The biscuit recipe is a fast drop biscuit version- the butter is melted before mixing in, rather than cut in. In the photo below, the biscuits were made with cheddar cheese and crumbled bacon in the dough. ​Mmm.

BTW, the link to the cherry tomato salad has two tomato recipes- a surprisingly hearty tomato salad, and the most delicious vegetable gratin I've ever tried.  (Bonus- it uses tomatoes AND the extra zucchini or summer squash that seems to always hide under the leaves until it's big! 
Picture
0 Comments

Week 5 assignment and DIY Instant Oatmeal Packets

5/11/2019

0 Comments

 
Picture
Your assignment this week is to look through the grocery ad for things on your inventory list that you need. With the budgeted amount of money you have (ballpark figure is $14 per week, per person) buy your three months' worth of however much you can on your list.

Do you like to use instant oatmeal?  You can save money (and know exactly what you're eating) by making your own. It's so quick and handy to have it all made up!
 
Homemade Instant Oatmeal 
4 cups quick oats (oatmeal), gluten-free if you need them
1-3 tsp. cinnamon
½ - 2/3 cup brown sugar*
½ - 1 tsp. salt
optional: 1/2 cup dry milk powder
optional: 1 c. chopped dried fruit or toasted nuts

Put 1 ½ c. of the oats in a blender; blend on high until almost powdery.  Dump this into a medium-sized mixing bowl; stir in cinnamon, brown sugar, salt, and milk powder and fruit/nuts if you’re using them.
 
After making it for the first time, see if it needs adjusted for your family’s tastes-- take 1/4 c. of this mix, combine in a bowl with ½ cup water, and microwave for 60 seconds. Taste it.
Is it great? Does it need more cinnamon? Sugar? Salt?  Add as needed, then cook another bowlful to see.  Take notes so you don’t have to do this next time.  😊 
 
Store in a canister, a quart-sized ziptop bag, or pre-portioned into snack-sized ziptop bags.
This batch can easily be doubled or tripled.
 
You can pre-portion these into snack-size baggies (then reuse baggies!), or just keep a measuring cup in the canister or bag. If you want individual servings measured out ahead of time, place either 1/2 c. or 1/3 c. mix in each baggie.

TO USE:
One large serving:  use ½ c. mix and 1 c. water.  Microwave 90 seconds; let stand. 
One small serving: use 1/3 c. mix and 2/3 c. water.  Microwave 60 seconds; let stand.
For four large servings (or 6-8 small ones), use four cups boiling water and add 2 to 2 ½  cups oatmeal mix.
Adjust water and/or mix to make it as thin or thick as you like.  

    
* For children who aren't yet accustomed to sugary oatmeal, use 1/2 cup brown sugar.  For those sugar-addicted husbands, you may need to add more. Regular sugar, evaporated cane juice, or an appropriate amount of stevia may be used. 
If your brown sugar is lumpy, it can be added to the blender with the 1 ½ c. of oats and blended with them.
 
Here are some flavor combinations; the sky's the limit!

Apple Cinnamon- Use the higher amount of cinnamon; you might even go up to 1 ½ to 2 Tbsp. Stir in 1 c. chopped dried apples.

Apricot Almond- Add 1 tsp. almond extract to the oats being blended.  At the end, stir in ½ c. finely chopped dried apricots and ½ c. chopped toasted almonds.

Banana Maple- Add ½ tsp. maple extract and ½ to 1 c. banana chips to the oats when they’re blended.

Chai Spice- Use 2 tsp. cinnamon, 1 tsp. ginger, ½ tsp. cardamom, and ¼ tsp. cloves. (If you like, you can also add ¼ tsp. ground black pepper and ½ tsp. allspice.)  For Vanilla Chai, add 1 Tbsp. vanilla to the oats when they're blended, or use vanilla powder.
 
Date Nut- Use the higher amount of cinnamon. At the end, stir in ½ c. finely chopped dates and ½ c. toasted chopped walnuts or other nut.  TIP- if you chop the dates and the nuts together, the dates won’t stick to your knife as badly.
 
Dinosaur- Use the higher amount of cinnamon. Stir in ¼ c. dinosaur-shaped sprinkles.
 
Maple Brown Sugar- Add ½ tsp. maple extract to the oats being blended. Use the higher amount of brown sugar (dark brown if you have it), and the lower amount of cinnamon.

Pumpkin Spice- Use 2 tsp. cinnamon, plus 2 tsp. ginger, 1 tsp. nutmeg, and 1/2 to 1 c. pumpkin powder. Best if you also use the 1/2 c. dry milk powder.

Raisin, Apple & Walnut- Use the higher amount of cinnamon.  At the very end, stir in ½ c. chopped raisins, ½ c. chopped dried apple, and ½ c. chopped toasted walnuts.

Strawberries and Cream- Use either ½ c. dry milk powder, or ½ c. powdered creamer. Stir in 1 c. chopped dried or freeze-dried strawberries. You can also make Raspberries and Cream, Blueberries and Cream, or Peaches and Cream this way.
 
Very Berry- Add 1 tsp. vanilla to the oats being blended. Use the lower amount of cinnamon.  Omit brown sugar, and use 1 c. of the berry drink mix from the Home Storage Center. Stir in 1 c. chopped dried cranberries or other dried berry.
0 Comments

Creamy High-Protein Pasta, Dairy Free

3/23/2015

2 Comments

 
Picture
This is meat-free, dairy-free, and in the photo above, also made using gluten-free pasta.  Its rich and creamy taste would never make you suspect there are so many 'normal' ingredients missing.  You will not taste the avocado, and surprisingly, it doesn't even make the sauce look green.  It adds richness along with those healthy, satisfying fats.  
If you used canned chickpeas, you'll have about one cup extra; you can either stir those in with the pasta, or save them for another use.
If you don't have an avocado, or don't want to use one, omit it and increase the chickpeas to three cups instead.

12-16 oz. pasta, cooked according to directions; save the cooking water
1 Tbsp. olive oil
3 cloves garlic, minced
2 cups cooked chickpeas- or use 2 cups from two (14-oz) cans, drained
one 6" sprig fresh rosemary, or 1-2 tsp. dried rosemary
1/4 tsp. red pepper flakes
1 medium avocado, peel and pit removed
1 Tbsp. lemon juice
salt and freshly ground black pepper to taste
1/4 c. chopped fresh parsley, or 1 1/2 Tbsp. dried parsley

While the pasta is cooking, heat 1 Tbsp. olive oil in a small skillet over medium-high heat. Add the garlic; cook and stir 2-3 minutes or until fragrant.

In a blender, combine 3 cups of the pasta cooking water (may also use the water drained off the cans of chickpeas), chickpeas, rosemary, red pepper, avocado, and lemon juice.  Blend on high until smooth.  Add salt and pepper to taste (start with 1/2 tsp. salt), and stir in parsley.  
Pour over pasta and toss to coat.  
If the sauce is too thick, add water 1 Tbsp. at a time until it's the consistency you like.  


2 Comments

Santa Rosa Plum Gelato

8/16/2014

1 Comment

 
Picture
Santa Rosa plums are dark on the outside, often with a bluish hue that rubs off, ruby-colored inside, and explode with sweet juice when you bite into a fully ripe one.  They are apparently highly prized, which is nice for me, because my 3-in-1 plum tree is about half Santa Rosa.  They tend to ripen pretty much at once, which means we have only about a two-week window for eating them fresh, and need to be quick about canning, drying, making jam, or otherwise using them.  

Gelato usually uses milk instead of cream, and sometimes fewer egg yolks, as well.  If you use whipping cream in place of the milk, you'll have plum ice cream instead.  You can triple this batch if you really, really want to pull out your ice cream maker, but this smaller batch can be made using a high-speed blender. It's lightly sweet, with just enough brightness from the fruit, and full of flavor.  And yes, you may use other types of plums.  The color may or may not be the same, though, depending on the variety you use.  If you can't have eggs, you could thicken the milk with 1 Tbsp. cornstarch instead, but it won't be as creamy.

One pound of plums can mean anything from 4-10 plums, depending on their size.  If yours are small, ping-pong-ball sized, you'll need about ten.  If they're big ones, 2 1/2" across or so, you'll likely need only 4-5.  Either way, the goal is to end up with about 1 3/4 c. puree.

Santa Rosa Plum Gelato
Makes about one quart

1 lb. Santa Rosa plums
1/8 tsp. almond extract, optional but delicious!
1/2 tsp. vanilla extract
1 c. whole milk, divided (dairy-free options include almond milk, rice milk, or coconut milk)
2 egg yolks
pinch of salt
1/2 c. sugar

Wash plums and remove stems.  Remove pits; you'll to cut them out.  Drop the pitted plums into a high-speed blender, add almond and vanilla extracts, and blend until smooth.   Pour into two empty ice cube trays.  Pour 1/3 c. of the milk into the blender and swish it around to get more of the puree; pour this into the ice cube trays as well.  Put them in the freezer.

Combine the two egg yolks, salt, and the sugar in the unwashed blender.  Heat the remaining 2/3 cup milk in the microwave for 1 minute, until steaming.  Meanwhile, turn the blender on to beat the yolks and sugar.  With the motor running, pour the hot milk in a thin stream into the yolks.  Once it's all in, increase speed to high, and run about two minutes, until the custard thickens slightly.  It will begin to coat the blender sides with a slightly thicker, opaque coating, and the mixture will steam quite a lot.  

Pour the custard into a container with a lid; refrigerate. Wash the blender; there's not much more unpleasant to wash off than dried egg yolk!

3-4 hours later, pull both the now-frozen puree and the now-chilled custard out.  Pour the custard into the (washed!) blender, add the puree cubes, and blend, using the plunger handle to get them to mix.

The gelato will be a soft-serve consistency.  If you want to be able to form round scoops, pour in a container and return to the freezer for another 1-3 hours.

1 Comment

Indoor S'Mores

7/17/2014

0 Comments

 
Picture
The fastest, simplest S'mores ever!  My 6-year-old had a blast making these nearly by herself.  If you have a toaster oven, you can make just a few and hardly heat the kitchen up at all.  Even a big batch doesn't make your whole kitchen hot, or make you smell like campfire, or have the neighbors wondering what's on fire.  
If you use GF/CF chocolate chips and GF grahams, these are also a gluten-free, dairy-free treat.

For a big batch, you will need:

1 cup chocolate chips (milk chocolate or semisweet, you choose)
one 10-oz bag regular marshmallows
1/2 cup graham cracker crumbs (I used precrushed ones) OR 4-5 crackers, crushed
Also:
A cookie sheet, an oven with a broil setting, and a sheet of parchment if you want the easiest cleanup.

Put the oven rack in the highest position.  Dump the chocolate chips into a microwaveable bowl; I used a Corelle cereal bowl.  Microwave for one minute; stir.  If it's not quite melted, microwave 30 seconds more; stir. Repeat if needed, but once you get past 2 minutes it overheats and clumps.  (You can rescue it by stirring in 1-2 tsp. oil.)

Dip the bottom half of a marshmallow into the chocolate, then dip into graham cracker crumbs.  Place on cookie sheet, at least 1/2" apart.

Turn the broiler on and put the marshmallows in.  If you have HI and LO options, here's what happened in my oven with them:

HI:  browned at 35-40 seconds.  Centers were still firm.
LO:  browned at 1 1/2- 2 minutes.  Nearly the whole marshmallow was now melted and gooey.  

Either way, watch these things closely!   Don't walk away for even a few seconds or they may be black when you get back.  Flaming marshmallows over a campfire in the dark may be entertaining, but they're not nearly as amusing in the house!

Picture
The marshmallows ready to be broiled.
0 Comments

Chocolate Fudge Banana Muffins

4/12/2014

0 Comments

 
Picture
Warm, chocolatey, just sweet enough, high fiber, and with little pockets of gooey melted chocolate chips!   My sister-in-law posted a similar recipe on Facebook.  It sounded delicious and had very little added sugar.  The original recipe called for applesauce instead of oil, but I'm a fan using healthy fats alongside carbohydrates so that my kids and I aren't hungry again an hour after breakfast!  It helps you process the fiber in these, too.

Chocolate Fudge Banana Muffins - makes 12
(can be gluten-free and dairy-free)

3 medium bananas, very ripe, mashed (about 1 cup)
2 eggs
1/4 brown sugar
1/4 c. oil or melted butter (I like coconut oil in these)
1/3 c. cocoa powder
1 tsp. vanilla
1 1/3 c. oat flour (or you can use all-purpose flour or whole wheat flour)
1/2 tsp. baking soda
1 1/2 tsp. baking powder
1/2 tsp. salt
chocolate chips, optional (1/4- 1/2 cup)

Preheat oven to 350 degrees.  Grease a 12-cup muffin tin.  
Whisk together eggs and brown sugar.  Mix in the oil, cocoa powder, and vanilla.  Mix the dry ingredients and add to the wet.  Stir in chocolate chips.

Divide between the muffin cups; bake about 17-23 minutes, or until the top of a muffin springs back lightly when gently pressed.
0 Comments

Edible Geodes

4/4/2014

0 Comments

 
Picture
These are fun.  We made them as a little homeschool science project.  EVERYONE in the family thought these were awesome, and we had enough to give a couple to some of my son's friends who are fascinated with rocks.  My next-door-neighbor, the Webelos Scout leader, pointed to a pile of broken rocks on her sidewalk.  "This,"  she said, "was what we did so the boys could feel like they might find a geode- we gave them hammers and rocks from our yard.  We should have made these instead!"

They'd love them too.

These would make some amazing and unusual Easter eggs, too:  make a bunch the same size and wrap two halves together to form a ball.

Edible Geodes
Crystal-growing solution (Rock candy syrup)
1 ½ c. sugar
½ c. water
Mix the two, heat on high in a small saucepan, and stir until the sugar completely dissolves.  Add several drops food color if you want, along with ½ tsp. flavoring (optional). Let cool a bit while you make the rock shells.

Rock Shell (Marshmallow Fondant)
8 ounces marshmallows
2-4 Tbsp. water
1 lb. powdered sugar
¼ c. coconut oil or shortening

Mix marshmallows with 2 Tb. water in a microwave-safe bowl, heat for 30 seconds in microwave.  Stir.  Microwave 30 seconds more, stir. Repeat until it’s melted and smooth.  Add the powdered sugar and mix with a spoon and then with your hands.  Spread 1 Tbsp. coconut oil on clean counter, knead the fondant on top adding more coconut oil when needed.   When smooth and stiff, take half of it and set aside.  Take other half and knead in ¼ c. cocoa powder to make fondant brown.  Roll out ¼“ thick.  Roll out the white half to the same size and stack them on top of each other.    Line a few bowls with aluminum foil, sprayed with nonstick spray.  Cut a piece of the two-layer fondant to fit, and line a bowl with it, with the brown side touching the foil.  Repeat until you run out.   Trim off any fondant that is beyond the lip of the bowl, using scissors.  Set aside.

Pour the sugar syrup into the fondant-lined bowls.  Let them sit, undisturbed, for at least a day (or 2-3 days for bigger crystals).  When ready, break the surface and pour off the syrup. Turn the geodes upside down to drain for an hour.  They’re ready! 

Picture
0 Comments

Coconut Cake- using coconut flour and agave

4/1/2014

0 Comments

 
Picture
This gluten-free cake is high in fiber, but you'd never know it when eating it.  It just tastes like a moist coconut cake.  It also has a delicious cream cheese frosting that you can sweeten using agave or honey, and a lemon-cream cheese filling between the layers.  This makes a small cake, 6" round if two layers, or a single 8" layer:  a much better size for most people!

Coconut Cake:

4 large eggs
1/2 c. melted coconut oil
1/2 c. agave nectar
1 Tbsp. vanilla
1 tsp. coconut extract
1/2 c. coconut flour
1 tsp. baking soda (this is too much, I can taste it and the cake overbrowned)
1/4 tsp. salt
1/8 tsp. xanthan gum
1/2 c. shredded coconut, either sweetened or unsweetened
Cream Cheese Agave Frosting (recipe below)
1 1/2 Tbsp. orange or lemon marmalade
1 cup sweetened shredded coconut 

Preheat oven to 350 degrees.  Grease sides and line bottom of a 6" round pan* with a circle of parchment paper.  Set aside.

Whisk eggs until light in color and a little foamy, about 2 minutes.  Add the coconut oil, agave, vanilla, and coconut extract; mix well.  Add coconut flour, then put the baking soda, salt, and xanthan gum on top of the coconut flour, and mix all together.  The batter will be very thin at first, but will thicken within minutes as the coconut flour begins absorbing liquid.  Stir in the 1/2 c. shredded coconut.

Pour into the prepared pan.  Bake until center no longer jiggles and toothpick inserted in center comes out clean, about 45 minutes.  Run a knife around the outside edge of the cake to loosen it.  Cool cake, in the pan, on a cooling rack for 10 minutes.  Remove from pan/s and cool completely.

When cool, split the 6" cake into two layers.  Frost the first half with lemon-cream cheese filling.  Place the other layer on top of the filling, then frost the entire cake.   Pat coconut onto the sides of the cake, then sprinkle it all over the top.
  
*If you don't have a 6" round, you may use either one 8" round (reduce baking time to about  30- 35 minutes), a 9x5 loaf pan (about the same baking time), 12-15 cupcakes (about 30-35 min. of baking), or four 4" round pans (reduce baking time to  18-20 minutes each).

Cream Cheese Agave Frosting:  use the recipe for Fluffy Honey-Cheesecake Frosting, except substitute agave for the honey.

To make the lemon-cream cheese filling (or orange-cream cheese filling), take  3/4 cup of the Cream Cheese Agave Frosting and put it in a small bowl.  Add 1 1/2 Tbsp. marmalade and stir.  
0 Comments

Baggie Fudge 

3/22/2014

0 Comments

 
Picture
Bonus- this fudge can be made dairy-free and still have that creamy, melt-in-your mouth texture!

This week in Joyschool I taught the kids about the process of making chocolate.  I had a library book that had pictures of each step, from cacao tree to wrapped chocolate bars, and I brought hands-on things, as well.  They got to see, smell, and taste bits of roasted cocoa beans (didn't like them!- it's like eating unsweetened chocolate but crunchier.), see and smell cocoa powder, see, smell, and have cocoa butter rubbed into their skin, we melted and molded chocolates (cute little Easter shapes)... and then made this baggie fudge.  If you're making it yourself or have careful children, a single bag is fine, but for this group that includes a few 3-year-old boys, I double-bagged it. :)  This could be a fun Family Home Evening activity AND treat. 
Our batch was made using the coconut oil and coconut cream, since 3 of the kids can't have dairy.

I had brought walnuts in the shell to use in the fudge, but the kids had so much fun cracking the nuts first and eating the bits inside that they were all gone before the fudge was ready.  It's good fudge either way!

Baggie Fudge
1/2 c. coconut oil or butter, softened or melted
1/2 c.  cocoa powder
1/3 c. coconut cream, OR 1/4 c. water and  1/2 c. nonfat dry milk powder
a pinch of salt
1 tsp. vanilla 
1 lb. powdered sugar (about 4 cups unsifted)
1/2 c. chopped nuts (optional)

Put the ingredients in a gallon-sized ziptop bag.  Put this bag inside another bag if  it seems like a good idea.  Squish, knead, or pound the bag until everything is well mixed.  (Giving the kids 30 -second turns seemed to work the best- and gave them practice counting.)  

Once it's mixed, squish the mixture into a rectangular shape near the top, making the rectangle about an inch narrower on each side than the bag.  Put the bag on a cutting board or similar surface.  Cut down one side of the bag and across the bottom with scissors. Cut fudge into squares, or use small cookie cutters to make cute shapes.  Makes about 1 1/2 pounds.

If fudge is a little too soft, let it chill in the fridge or freezer for a few minutes to firm up.


0 Comments

Moist, refined sugar free, grain-and-gluten-free Chocolate Quinoa Cupcakes

3/14/2014

0 Comments

 
Picture
A friend recently shared this delicious recipe with me.  Since I wanted to make cupcakes for a friend who can only handle sweeteners like honey and agave, it was time to tweak the recipe.  You can find the original, sugar-sweetened, recipe here, if you want to compare it to my version. As cupcakes, they needed more moisture than the original, plus a couple things needed adjusted to allow for honey.  And I discovered that the amount of water your quinoa was cooked in makes a huge difference in whether they're dry, moist, or collapse when baking.   (Not to worry, the problem should be solved now!)   Quinoa is technically a seed and not a grain.

I tried really hard to find a way to use just the blender to make the batter, and not need both it and a bowl, but the batter puffs up so much once the leavening is added, that it just didn't work out that way .  Oh well.

Everyone who has tried these loves them.

Moist Chocolate Quinoa Cupcakes

1/2 c. uncooked quinoa*
1 1/4 c. water 
1/3 c. any kind of milk (dairy, almond or coconut are fine)
4 large eggs
1 tsp. vanilla
3/4 c. melted coconut oil or other liquid vegetable oil
2/3 c. honey
a few drops of orange essential oil, or the washed peel of one clementine, optional
1 c. unsweetened cocoa powder
1 1/2  tsp. baking powder
1/2 tsp. salt

Cook the quinoa, covered, in the 1 1/4 cups water:  either combine in the microwave or stovetop.  To microwave,  put them in a microwave-safe bowl, cover, then cook for 5 minutes at full power, then 5 minutes at 50% power.  For stovetop:  combine in a pan that has a tight-fitting lid.  (If the lid isn't, use 1 1/2 cups water to compensate for what will evaporate.)  Bring to a boil, reduce to a simmer, and let simmer for 20 minutes, until water is all absorbed.
*or use 2 cups cooked quinoa and omit the water.

Preheat oven to 375 degrees.  Put liners in 18-24 cupcake tins, depending on how high you want the cupcakes.

Combine in a blender the cooked quinoa, milk, eggs, vanilla, oil, honey, and orange oil/peel if using it.  Blend until smooth.   Mix the cocoa powder, baking powder, and salt in a medium bowl.   Pour the quinoa mixture over the top, and stir until well-combined.  Spoon into cupcake liners, or use a spring-loaded ice cream scoop instead to portion out the batter.

For an easy, sweet topping, sprinkle each cupcake before baking with a few semisweet chocolate chips and chopped pecans or other nut.

Bake for about 20 minutes, until the top of a cupcake springs back when lightly pressed with a finger.

Frost with your favorite frosting if you like, or  try any of these.   The cupcakes above are frosted with whipped coconut cream with melted chocolate beaten in:  use 1 cup of chilled coconut cream and 1 cup melted semisweet chocolate.  Whip the cream until it starts to hold soft peaks, then add in the chocolate plus a teaspoon of vanilla and a pinch of salt.  Beat until fluffy and smooth.


0 Comments

Homemade Vegetable Broth Powder

1/23/2014

1 Comment

 
I have the HARDEST time finding bouillon that doesn't contain MSG.  Here's a solution:  no MSG, no fillers, no preservatives.  Only what you choose to put in it.

This recipe was adapted from Traci's Transformational Health Principles by Traci J. Sellers

Vegetable Broth Powder     (makes about 1 1/2 cups)
​
1 cup Nutritional Yeast (to make your own, see here)
1/4 cup RealSalt (or Himalayan salt; something with those trace minerals)
1 Tbsp. onion powder (see how to make your own, here)
1 1/2 tsp. turmeric
1 1/2 tsp. dried parsley
1 tsp. dried dill weed
1 tsp. marjoram or oregano, optional
1 tsp. dried lemon peel, optional
1/2 tsp. celery seed
1/2 tsp. dry basil
1/2 tsp. ground thyme 

 Put everything except parsley in a blender or food processor, in the order given.  Blend until
 powdered.  Add parsley, pulse just enough to chop it a little bit (you're aiming for small bits).  Store in an airtight container indefinitely.  

To use, add a heaping 1/2 tsp. per cup of water, or 1 Tbsp. of powder  for every quart of water.

1 Comment

Roasted Cauliflower and Chicken

1/16/2014

0 Comments

 
Picture
We discovered roasting vegetables about three years ago.  Now when I buy broccoli or cauliflower, they are almost always served roasted.  Even my kids who  "don't prefer"  (the PC term at our table) broccoli, like it roasted. 

 Roasted Cauliflower and Chicken    - serves 6-8
1 head cauliflower, cut into florets
1-2 Tbsp. olive oil
1/2 tsp. salt
2 cups cooked chicken 

Preheat oven to 475, adjust the oven rack to the lowest position about 20 minutes.  Put the cauliflower on a baking sheet, drizzle with oil, then sprinkle with salt.  Roast about 20 minutes, stirring once about after about 15 minutes.  Cauliflower is done when parts of it turn a deep golden brown.  Stir in the chicken .

 We ate this with rice and chicken gravy (see below) on the side; conveniently enough, it also takes about the same amount of time to cook.  If you start the rice first, then cut up the cauliflower, the rice should be done about the same time if you're using regular white rice and cooking on a stove top.

Since I didn't have any leftover chicken,  I put 1 lb of chicken in my pressure cooker along with two medium-small onions (or use one med-large) and about 1/2 tsp. salt.  My pressure cooker does not lose water when it cooks, so I didn't add any.  (If your pressure cooker does, please add water!  Probably 1/2 cup, as the chicken and onions release moisture as they cook.)  It was done after 15 minutes of high pressure. 

Clear Chicken Gravy
1 Tbsp. water
1 Tbsp. cornstarch
1 cup juices from cooking the chicken and onion

(microwave instructions)  
In a  1-cup glass measuring cup, stir together the water and cornstarch until smooth.  Stir in a little of the cooking juices, then stir in enough that you have 1 cup total.  Microwave for 1 minute; stir.  If it hasn't thickened yet, microwave another minute and stir again.  Add salt if needed.  (Mine didn't need it.)

0 Comments

Make your own nutritional yeast

1/9/2014

44 Comments

 
Picture
photo: Wikimedia Commons

Have you ever run across a recipe calling for nutritional yeast and you didn't have any?  Maybe didn't even have access to some?  Or maybe you attempted to make a batch of bread and the yeast wasn't working anymore?

Too bad I didn't know, a month ago, what I'm about to tell you.  I threw away an entire pound package of baking yeast (Saccharoymyces cerevisiae) because it wasn't raising my dough.  Sad.

First of all, what IS nutritional yeast?  It's deactivated yeast, frequently the strain used is   Saccharomyces cerevisiae.  Totally dead yeast.  Usually it is cultured in something sweet for a few days, then heated to deactivate it.  It adds a nutty, savory, almost meat-y depth of flavor to recipes. (The term is 'umami'). It also contains B vitamins and is a complete protein. 

I've been studying a new (to me) breadmaking book  (more on that later!), and in it,  the author, Peter Reinhart, gives instructions for making your own nutritional yeast:

 Put 1/4 c. active dry yeast in a hot skillet.  Toast over med-hi heat until it turns a medium shade of brown. 

That's it.

Now, was my dysfunctional pound of yeast ready to be used as nutritional yeast without toasting?  No.  It was only  partly dead.  Or maybe 'mostly dead', to quote a favorite movie.  But it needs to be totally dead  before you consume it.   Besides that, toasting brings out flavor.

Ways to use nutritional yeast:
  • as a topping on popcorn
  • sprinkle on top of things in place of cheese
  • mix into mashed potatoes or scrambled eggs in place of cheese
  • add to soups or white sauces to improve flavor (the flavor acts similar to adding bouillon or broth)
  • use in this recipe for dairy-free buttery spread
  • sprinkle on top of homemade crackers or breadsticks before baking
  • make your own vegetable broth recipe, on this post.  Tastes like chicken.  :)


44 Comments

Sweet Potato Curry with Turkey

11/28/2013

0 Comments

 
Picture
Curry is becoming known as a  bit of a superfood.  The spice blend's famous color is from one of its ingredients, turmeric.  Turmeric is now known to reduce inflammation- brain, systemic, and joints.  Here's a great way to use up some leftovers in a flavorful, healthy way!
Curry has an affinity for sweet, so it mixes perfectly with sweet potatoes or yams.

When I was in college, I lived in the cheapest off-campus apartment around.  There were several foreign students in the complex, and one day we had a potluck dinner together.  
One of the first foods on the table was an amazingly yellow... something.  So I asked what it was.  "Curry," she responded, "It's a food from Korea.". 
Further down the table was another bowl of yellow food.  I asked about it.  "Chicken Curry," she explained, "The Jamaicans invented it."  
Another friend walked up with a now-familiar color.  I asked. 
"Curry.  It's from Africa."

It was good.  All three were.  Good enough I could see why everybody claimed it was from their own native country.

Since my roommate was the Jamaican, that's whose recipe I got, though I had to watch her make it and estimate the amounts at the time.  This recipe is based on hers, though she used bone-in chicken thighs, less onion but added a couple green onions,  potatoes instead of sweet potatoes, and serve it not only over rice, but also with thick, chewy 'Jamaican Dumplings'.  The recipe is flexible.

Curry.  From America.

Sweet Potato Curry with Turkey- makes about 6 cups

2 Tbsp. oil
1-2 Tbsp. curry
2 medium onions, sliced into rings
1 c. cooked turkey, cubed (can use chicken instead)
1 lb. sweet potatoes, peeled and cubed*
1/2 tsp. salt
1/4- 1/2 tsp. pepper, to taste
water

*I used raw sweet potatoes, but feel free to use cooked ones- you can even get away with using leftover Thanksgiving baked sweet potatoes as long as they're not too saccharine; reduce cooking time accordingly.

Heat oil on medium-high heat until shimmering-hot.  Add the curry powder- amount depends on how strong you like it.  (I like it strong.)  Stir, and let it heat for about a minute to 'bloom' the flavor.  It's done when it starts to smell delicious and a little toasty. DON'T burn it.  (Nasty, bitter flavor!...)  Reduce heat to medium, add onion; cook until they are tender, stirring occasionally.  
Stir in turkey, then add sweet potatoes, salt, and pepper.  Add water until the food is nearly covered.  Put a lid on the pan and simmer, covered, for about 20 minutes or until just tender.  Remove lid, increase heat and gently boil until liquid is reduced by about half.  

Serve hot by itself or over rice.

Optional:sprinkle with any of the following:
chopped peanuts
green peas
mandarin orange segments
shredded coconut
diced apple
dollop of sour cream or unsweetened yogurt
chopped hardboiled eggs
bits of dried fruit

0 Comments

Gluten free, dairy free pumpkin cheesecake

11/9/2013

3 Comments

 
Picture
See the bottom of this post for photos on making the heart-swirl pattern.

A friend of mine has to avoid dairy, wheat, and oats- and we were going to be together at a potluck lunch on Thursday.  The pumpkin cheesecake last week (for a different group) was such a hit I decided to adapt it so she could enjoy it too.  But with a bit of chocolate.  Like pumpkin-chocolate chip cookies.

I wanted it to be relatively inexpensive- no quart of coconut yogurt! -that stuff's pricey. Coconut milk and coconut cream, sure.  I have that on hand.  
No recipes using those appeared to be online anywhere, though I found the chocolate-version crust here.  There were some cashew-puree based ones- but not only did I not have time to soak nuts, but wanted this to be a recipe even the nut-allergic could use. So I started with my tried-and-true 'normal' recipe, and adapted. And I was willing to buy one 6-oz cup of coconut yogurt to put in the (optional) topping. 
You won't taste the apple cider vinegar, but it adds both the tartness and savoriness you'd get from cream cheese. If you have 2 (14-oz) cans coconut milk and a 19-oz can of coconut cream, that will be exactly enough for the filling, the topping, and the ganache.

If you want to use honey in the filling instead of sugar, use just 1 cup honey plus 1 Tbsp.  Since this also adds about 1/4 cup of water, add about a tablespoon additional pumpkin powder OR a tablespoon oat or coconut flour so the cheesecake won't be too soft.

Gluten free, dairy free Pumpkin Cheesecake
Crust:
1 c. fine-shred coconut, toasted
1 Tbsp. coconut oil, melted
1 ½ Tbsp. honey
1 tsp. vanilla
1 ½ Tbsp. cocoa powder 

Stir together and press firmly onto the bottom of a 9” springform pan.  Set aside.  
For a fall-spice crust instead of chocolate, omit cocoa powder, and instead use                 ½ tsp. cinnamon + ¼ tsp. cloves + ½ tsp. ginger

Filling:
1 1/3 c. sugar
1 tsp. cinnamon
3/4  tsp. ginger
¼ tsp. nutmeg
¼ tsp. cloves
½ tsp. salt
6 Tbsp. (slightly heaped 1/3 c.) pumpkin powder
2 (14-oz) cans coconut milk
3 Tbsp. apple cider vinegar
1 Tbsp. vanilla
5 large eggs, room temperature
1 c. coconut cream

Mix all together, in order.  Don’t overmix or whip air into it, or it may crack while baking.  Bake at 350 F for  75-90 minutes in a water bath, until center jiggles like Jello and internal temperature is 145-150 F.  Cool in oven or on counter, then chill, covered, in fridge 4 hours or more.

Rum-flavor Topping:
1 cup coconut cream, well chilled
½ cup coconut yogurt
½ cup brown sugar
1/8 tsp. salt
1 ½ tsp. rum extract

Whip cream until just beginning to thicken; add all else and whip.  Spread over chilled cheesecake.

Chocolate Ganache drizzle:
¼ c. (1 ½ oz) dairy-free chocolate chips
3 Tbsp. coconut cream or coconut milk

Heat gently to melt chocolate chips; whisk until smooth.  Drizzle on cheesecake.
3 Comments

Free e-book! Cooking with Eggs- Omelets and Frittatas

9/20/2013

0 Comments

 
Picture
 Today I have a free e-book offer for you, a cookbook, “The Egg and I.” It has tons of recipes for making omelets and frittatas, along with great tips on mastering eggs in the kitchen.

It's just over 40 pages of recipes for all kinds of omelets plus pages of frittatas

You can get it here, and you'll get to choose from four formats: PDF, Microsoft Word, HTML, or Kindle. 

Here's what Dennis Weaver, the cookbook's author, says:

The difference between a frittata and an omelet is that the ingredients in the frittata are mixed into the eggs instead of folded into an omelet. Usually a frittata is started on the stovetop and then baked in the skillet in the oven. They are sometimes called flat omelets or farmers’ omelets. They are larger and cut into slices to serve.

This is not your ordinary e-Book!  It has 31 different scrumptious omelet recipes. Omelets you won’t find anywhere else plus more than $30 in recipe books. Plus it tells you how to make them and gives video instructions.  Start making omelets like a pro. You can 
eat them for breakfast, lunch, and dinner.  

The last time we visited my son and his family in Minnesota, we stopped at Keys Café in Saint Paul where I had “The Loon Omelet” which personifies how versatile an omelet can be. The Loon Omelet is made with wild rice, mushrooms, onions, tomatoes, Swiss cheese, turkey, and topped with a hot mushroom sauce.

You can even make a party out of omelets, or host the next family gathering with an omelet bar. You’ll learn how here.

Omelets are easy, you can make one in as little as five minutes. You can make American omelets, Italian omelets, puffy omelets, and Irish omelets; even an omelet casserole.

Breakfast at your house will never be the same.
0 Comments
<<Previous

    Need a Search bar?
    One day I may upgrade my website-- but until then, use your web browser search bar. Type in my web address and what you're looking for, like this-- 
    www.theprovidenthomemaker.com  pumpkin --  and you should get results.


    Author

    I'm a disciple of Christ, a member of the Church of Jesus Christ of Latter-day Saints, a family-defending, homemaking, and homeschooling mom of eight children, two of whom sometimes can't have milk or wheat. Growing up on a farm in a high mountain valley, my parents taught me to 'make do', work hard, smile, and help others.  I love cooking, learning, growing food and flowers, picking tomatoes, and making gingerbread houses --which CAN be made allergy-friendly-- with my children.  I hope you find something to help you on my site!

    Archives

    April 2024
    July 2023
    April 2022
    September 2021
    March 2021
    December 2020
    April 2020
    March 2020
    February 2020
    January 2020
    December 2019
    November 2019
    October 2019
    September 2019
    August 2019
    July 2019
    June 2019
    May 2019
    April 2019
    January 2016
    November 2015
    October 2015
    September 2015
    March 2015
    February 2015
    November 2014
    October 2014
    September 2014
    August 2014
    July 2014
    June 2014
    May 2014
    April 2014
    March 2014
    February 2014
    January 2014
    December 2013
    November 2013
    October 2013
    September 2013
    August 2013
    July 2013
    June 2013
    May 2013
    April 2013
    March 2013
    February 2013
    January 2013
    December 2012
    November 2012
    October 2012
    September 2012
    August 2012
    July 2012
    June 2012
    May 2012
    April 2012
    March 2012
    February 2012
    January 2012
    December 2011
    November 2011
    October 2011
    September 2011
    August 2011
    July 2011
    June 2011
    May 2011
    April 2011
    March 2011
    February 2011
    January 2011
    December 2010
    November 2010
    October 2010
    September 2010

    Categories

    All
    Alcohol
    Alternate Cooking
    Appearances
    Apple
    Apricots
    April Fools
    Aprons
    Bananas
    Beans
    Beef
    Beets
    Bench
    Beverages
    Bonnet
    Bread
    Breakfast
    Budget
    Budgeting
    Cake
    Candy
    Canning
    Carrots
    Cheese
    Chicken
    Children
    Chocolate
    Christmas
    Cleaning
    Coconut
    Comfrey
    Common Core
    Constitution
    Cookbook
    Cookies
    Cooking Oil
    Crafts
    Dairy Substitutions
    Dehydrating
    Dessert
    Dried Fruit
    Earth Oven
    Earthquake
    Easter
    Edible Weeds
    Eggs
    Emergency Prep
    Essential Oils
    Faith
    Family Home Evening
    Fertilizing
    Food Storage
    Fourth Of July
    Freezer
    Frosting
    Fudge
    Garden
    Gardening
    Gingerbread
    Gluten
    Gluten Free
    Gold
    Government
    Grains
    Gratitude
    Hat
    Herbs
    Home Remedies
    Home Repairs
    Homeschool
    Home Storage
    Honey
    Hope
    Inflation
    Leftovers
    Legumes
    Lemon
    Main Dishes
    Mixes
    Mothers
    Noah
    Non Artificial Colors
    Non-artificial Colors
    Nuts
    Oats
    Oil
    Orange
    Paint
    Peaches
    Pear
    Pie
    Pizza
    Plums
    Poem
    Popcorn
    Pork
    Potatoes
    Powdered Milk
    Prayer
    Preparedness
    Projects
    Prophecy
    Pruning
    Pumpkin
    Quick Bread
    Rhubarb
    Rice
    Salad
    Salt
    Sauces
    Self Reliance
    Self-reliance
    Sewing
    Shelf Life
    Shelves
    Sky
    Smoothie
    Snacks
    Soup
    Spices Or Seasonings
    Squash
    Strawberries
    Substitutions
    Sugar
    Summer Fun
    Three Month Supply
    Time
    Tomatoes
    Trees
    Truffles
    T-shirts
    Tuna
    Ultra Gel
    Valentine\'s Day
    Vegetables
    Water
    Watermelon
    Wheat
    Work
    Year Supply
    Zucchini

    RSS Feed

Web Hosting by iPage